 ( 130 ) 22-Dec-2013
Now I start to work on the neck. I make my necks from a single piece of Mahogany. This means there won't be any joining lines at the heel and the headstock. I start by leveling the fretboard base using my jointer.
( 130 ) 22-Dec-2013
Now I start to work on the neck. I make my necks from a single piece of Mahogany. This means there won't be any joining lines at the heel and the headstock. I start by leveling the fretboard base using my jointer.
 ( 131 ) 22-Dec-2013
I trim off the end off the heel with the table saw.
 ( 132 ) 22-Dec-2013
And the other face is trimmed with the miter saw.
 ( 133 ) 22-Dec-2013
After drawing the outline on the side of the neck blank I trim up the fretboard face. I spend a bit of time making sure all of the faces of the neck blank are flat and square to the other surfaces. A bit of care at this stage will yield higher quality results later.
 ( 134 ) 22-Dec-2013
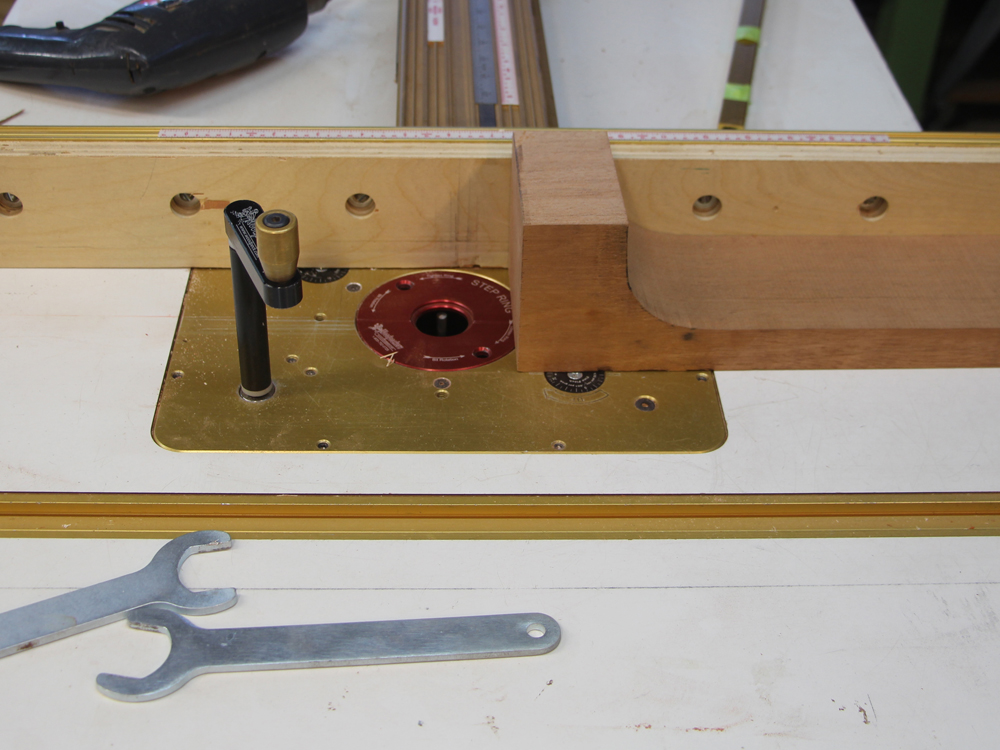
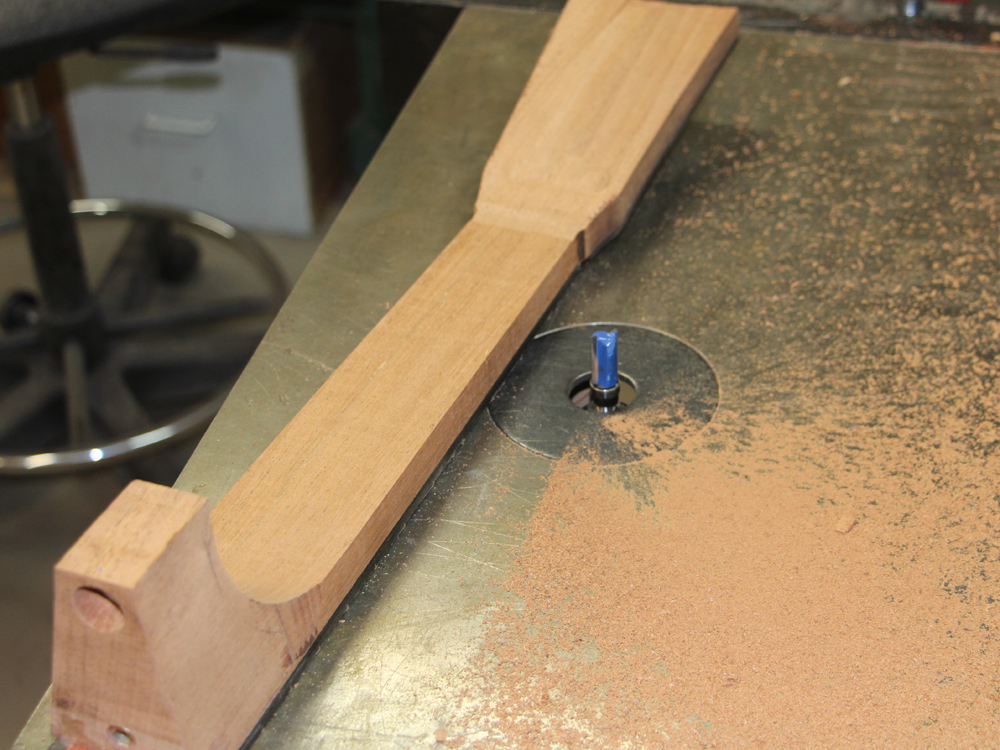
Here I am setting up the router table to make a channel for the truss rod.
 ( 135 ) 22-Dec-2013
The truss rod has two way action so we can fully control the shape of the neck. A truss rod is not generally a traditional feature of a classical guitar, but I am going to take a bit of engineering license and install one in this guitar. A second benefit of a heavy truss rod is that the additional mass reduces the motion of the neck when the strings vibrate which should improve tone and intonation.
 ( 136 ) 22-Dec-2013
The truss rod adjustment will be accessible through the headstock.
 ( 137 ) 22-Dec-2013
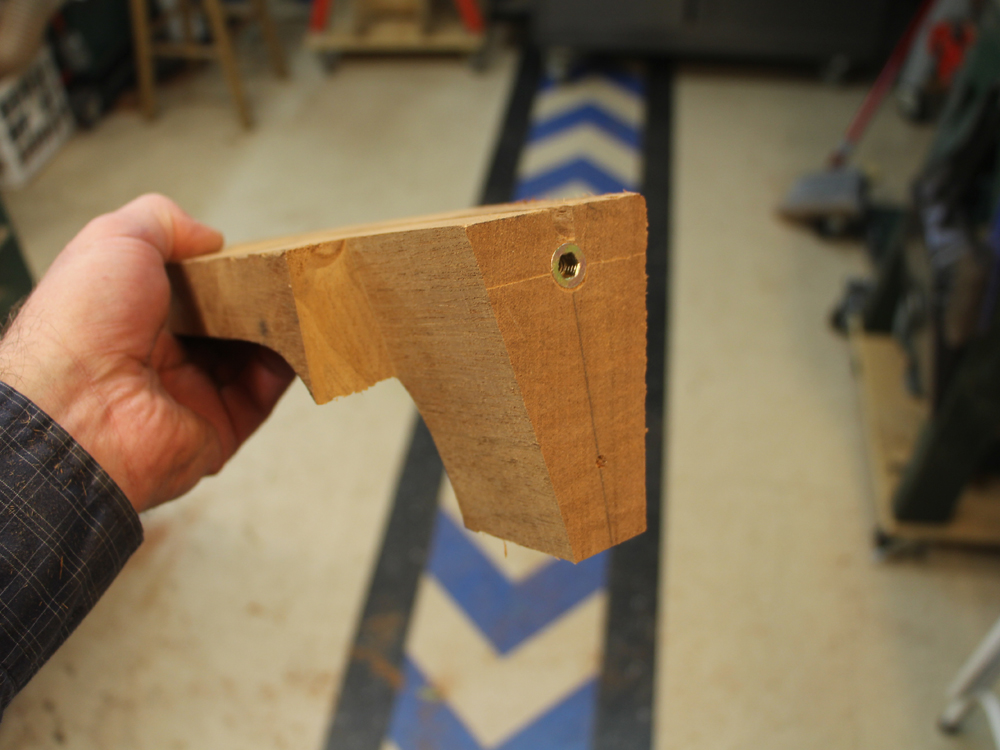
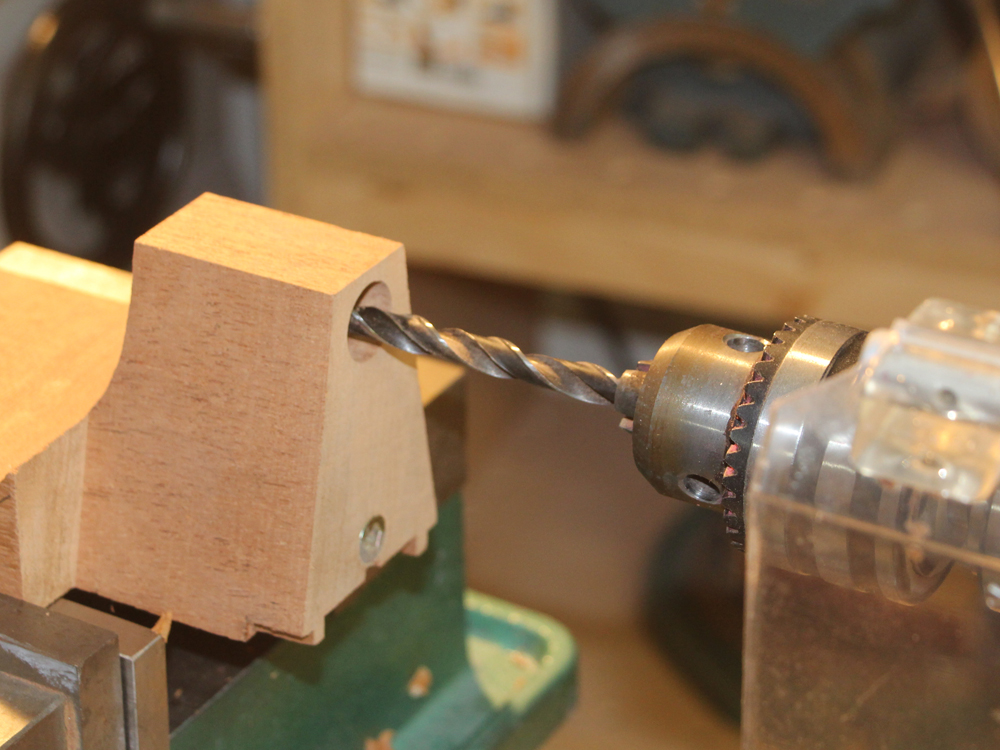
Here I am drilling a hole for the bolt used to attach the neck to the body.
 ( 138 ) 22-Dec-2013
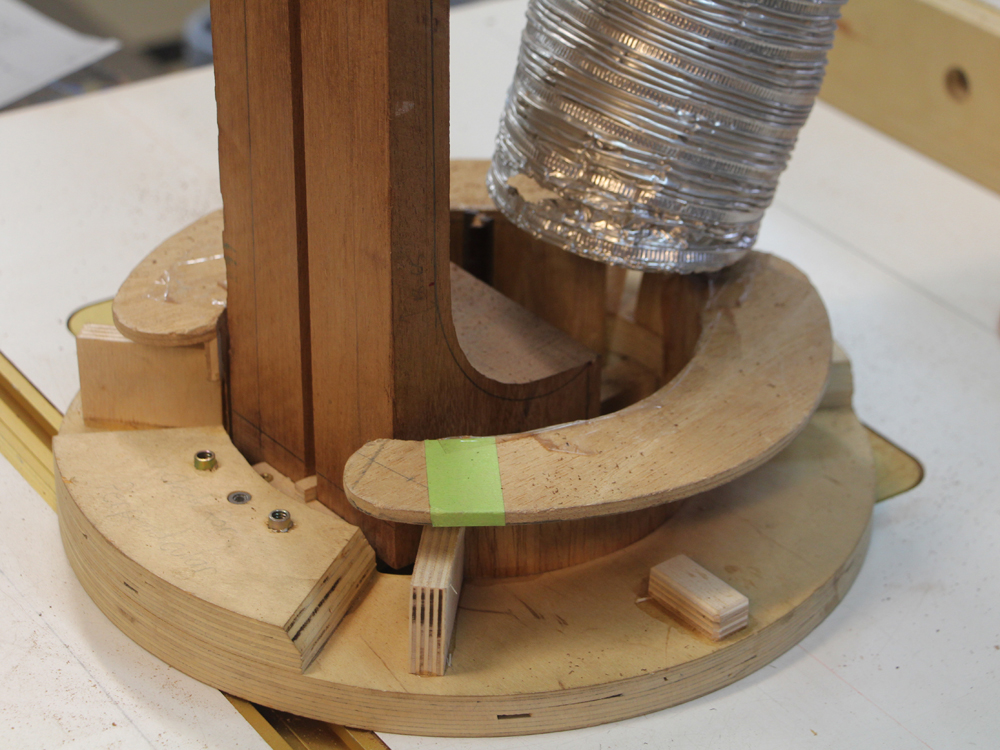
I have set up the router to shape the heel of the neck so it will match the heel channel in the body. I have a fixture that holds the template and and the neck blank.
 ( 139 ) 22-Dec-2013
The aluminum tube sucks up the copious amounts of sawdust.
 ( 140 ) 22-Dec-2013
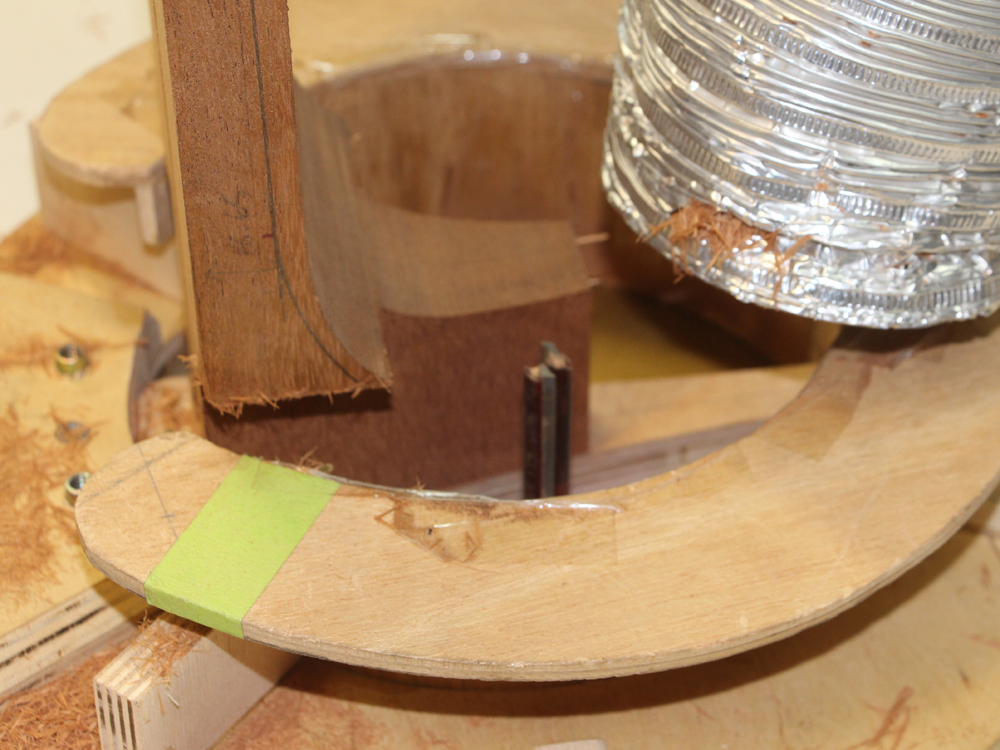
Here you can see the router bit and part of the shaped heel. Scary router bit!
 ( 142 ) 22-Dec-2013
The template and the bottom of the heel.
 ( 143 ) 22-Dec-2013
Now the heel has the same shape as the heel channel.
 ( 144 ) 22-Dec-2013
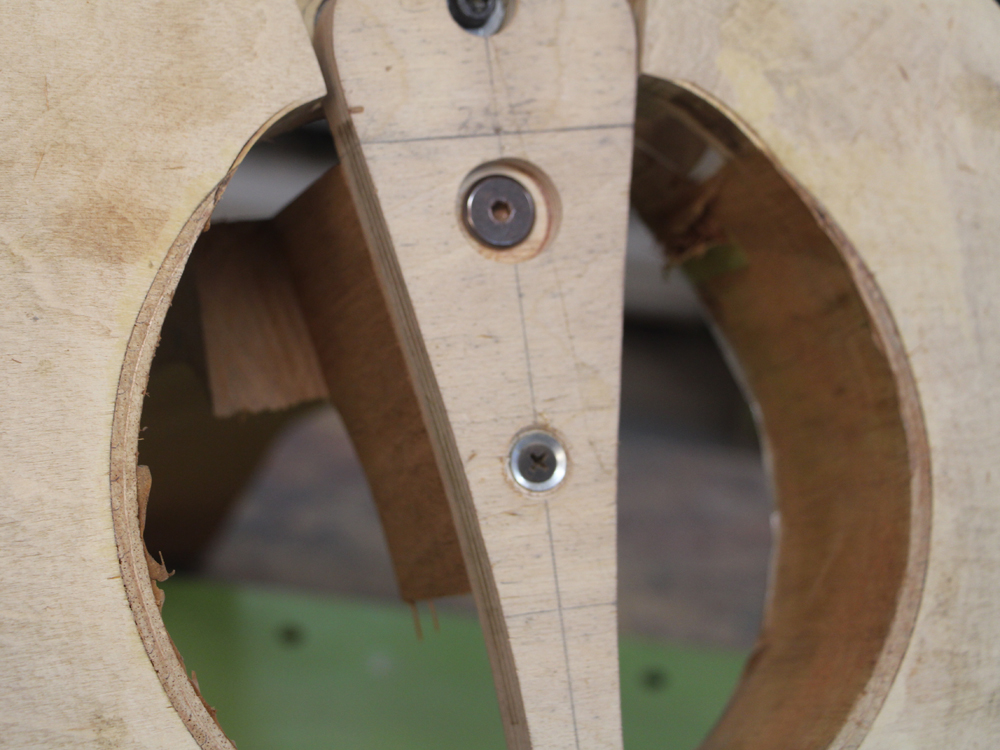
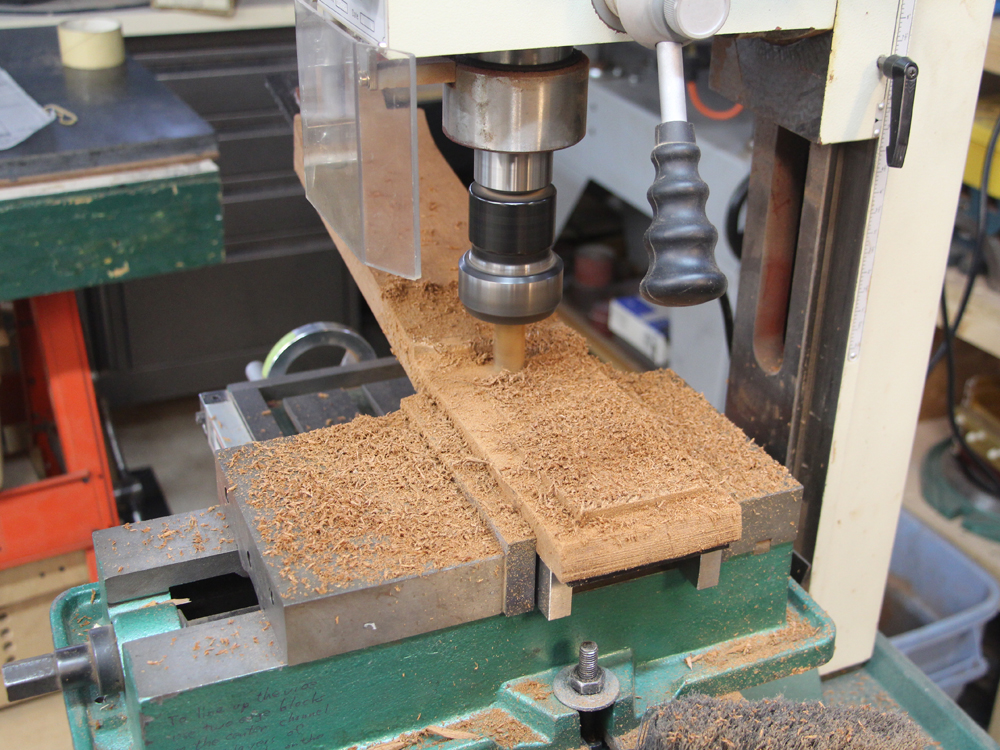
I use my milling machine to create the channels for the fretboard support structures and the attachment details.
 ( 145 ) 22-Dec-2013
The inner channel will hold the fretboard support plate, and the outside channels act as slots for the wing plates that help hide the slots between the neck and the top plate.
 ( 146 ) 22-Dec-2013
I want to make sure all of the hardware for the Tilt Action Adjustable Neck line up properly. So, I use a marking pin in the adjustment nut in the heel channel to mark the spot in the heel for the adjustment bolt holes.
 ( 147 ) 22-Dec-2013
I mount a piece of wood on the neck blank to mimic the fretboard and line up neck in the heel channel.
 ( 148 ) 22-Dec-2013
Then I press the neck into place and the marker pin leaves a hole where the bolt hole needs to be drilled.
 ( 149 ) 22-Dec-2013
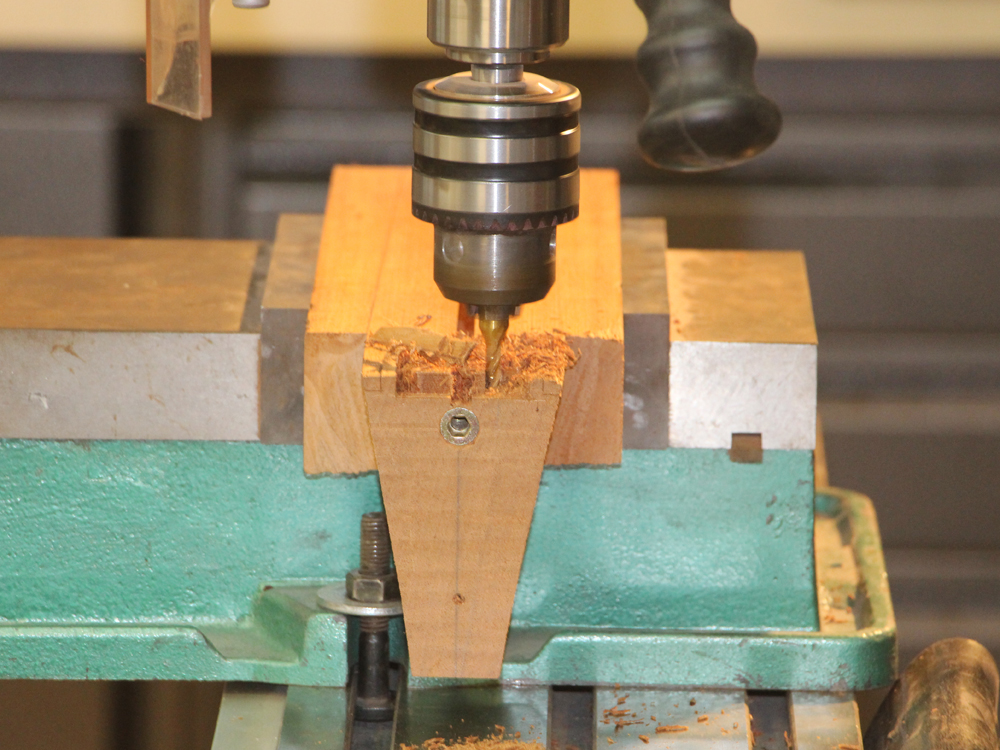
I use the milling machine to drill the holes for the adjustment hardware.
 ( 150 ) 22-Dec-2013
 ( 151 ) 22-Dec-2013
I really want the hole to come out in the middle of the heel.
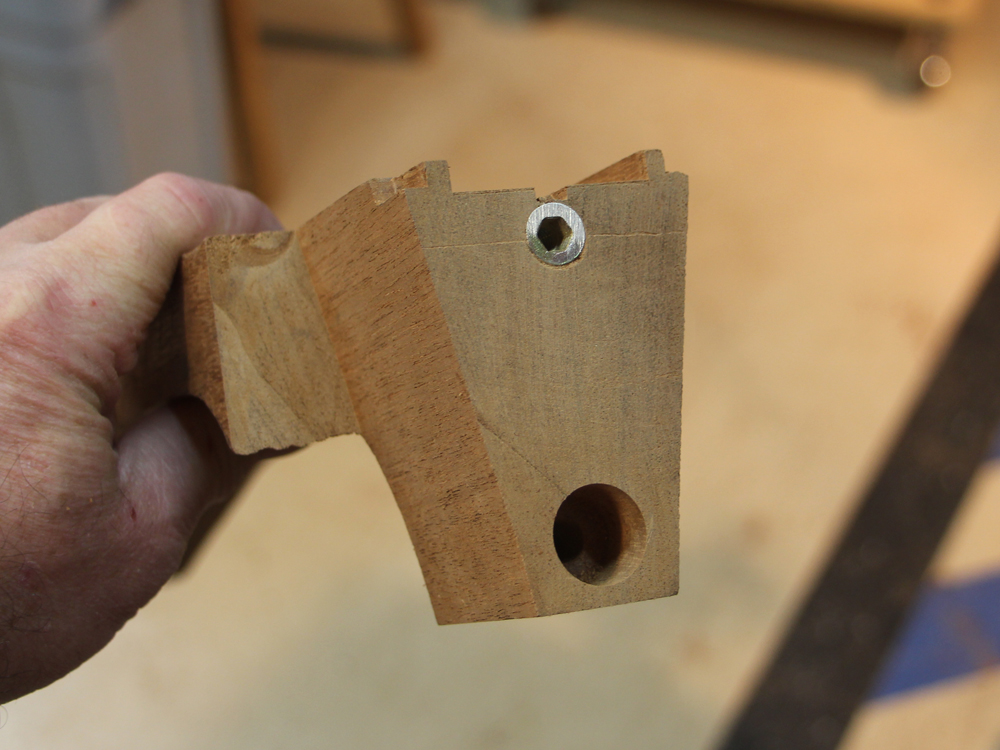 ( 152 ) 22-Dec-2013
 ( 153 ) 22-Dec-2013
This is the fretboard support plate. The fretboard is not directly attached to the body of the guitar, so this plate helps to stabilize the fretboard as it is cantilevered over the top plate.
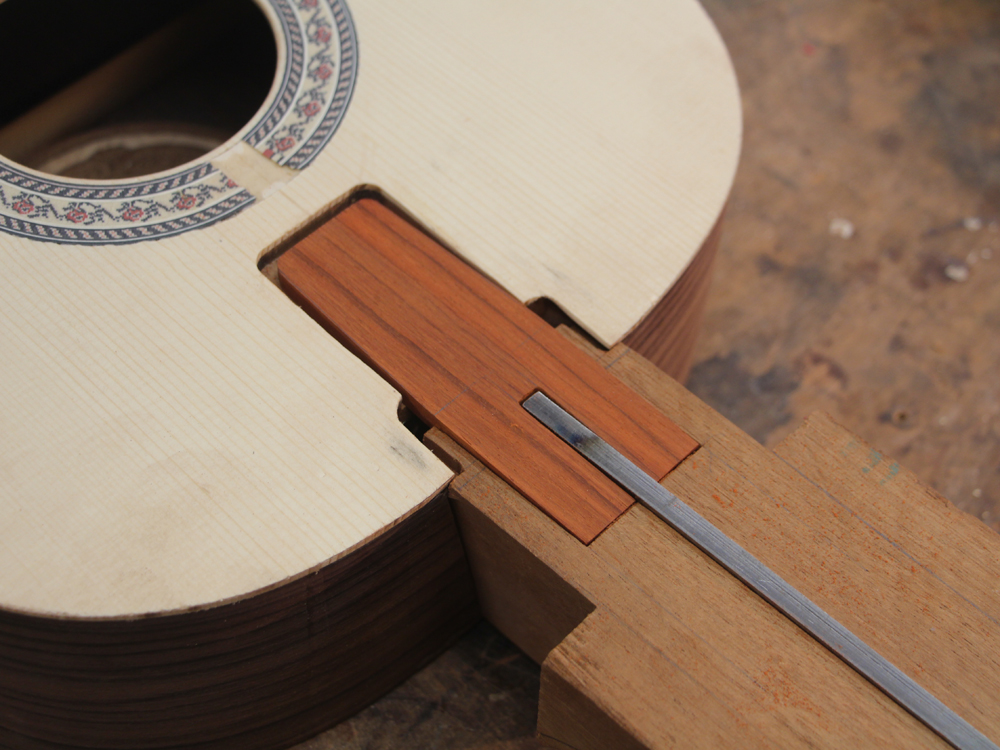 ( 154 ) 22-Dec-2013
Everything fits with a bit of room to allow adjustments.
 ( 155 ) 22-Dec-2013
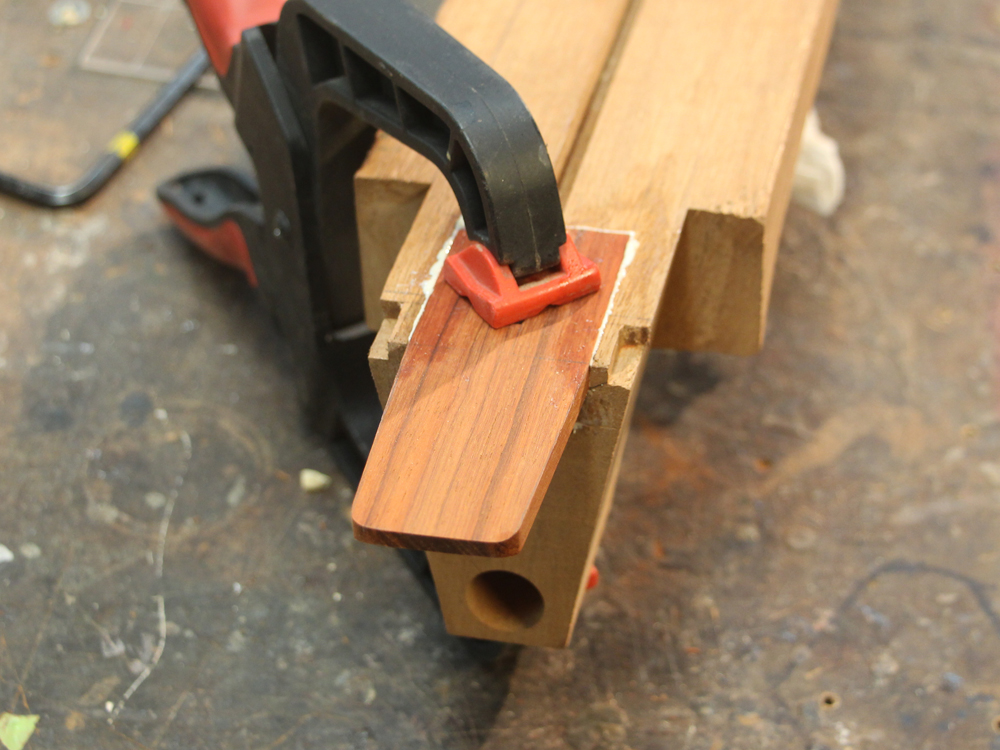
Gluing the plate in place.
 ( 156 ) 22-Dec-2013
Now I am using the drum sander to dimension the depth of the Ebony fretboard.
 ( 157 ) 22-Dec-2013
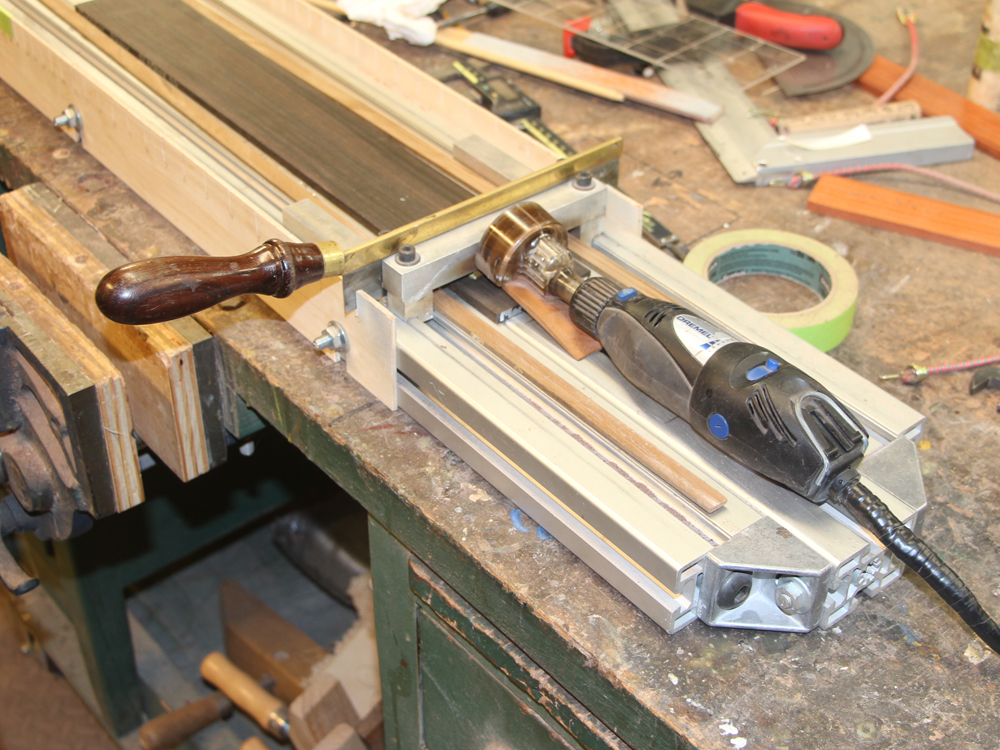
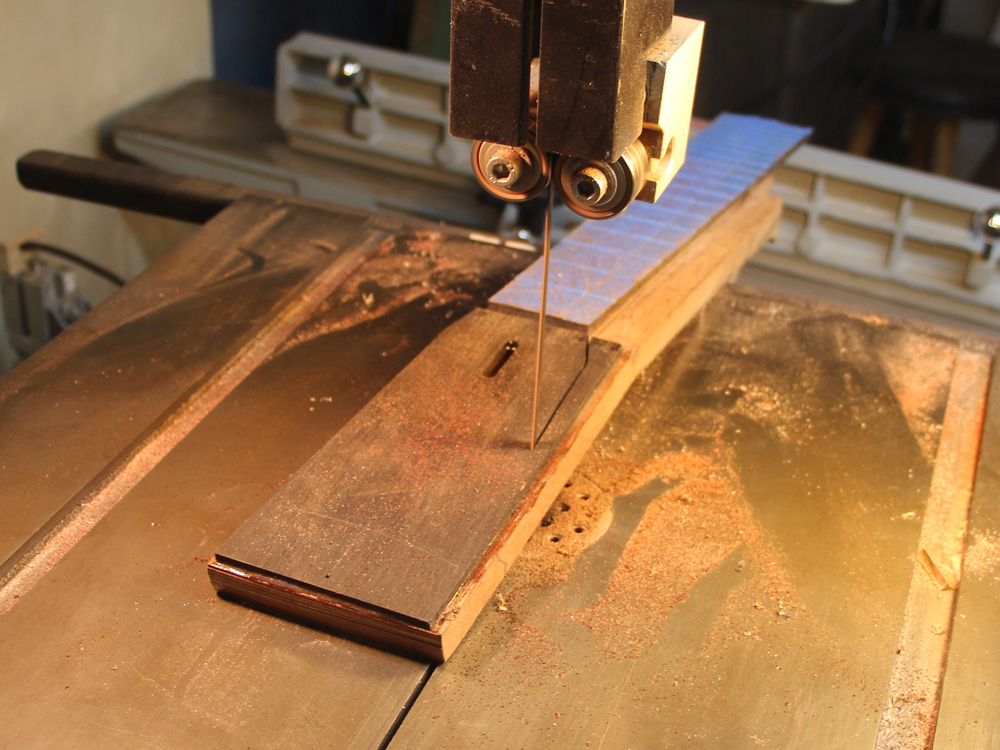
This is the tool I use to cut the slots for the fretwire. The two templates on either side of the rail set the placement of the guide sled.
 ( 158 ) 22-Dec-2013
My Dremel tool has a saw attachment that cuts the slots.
 ( 159 ) 22-Dec-2013
The saw is used as a stop that sets the position of the guide sled, and the saw runs along the face of the sled.
 ( 160 ) 22-Dec-2013
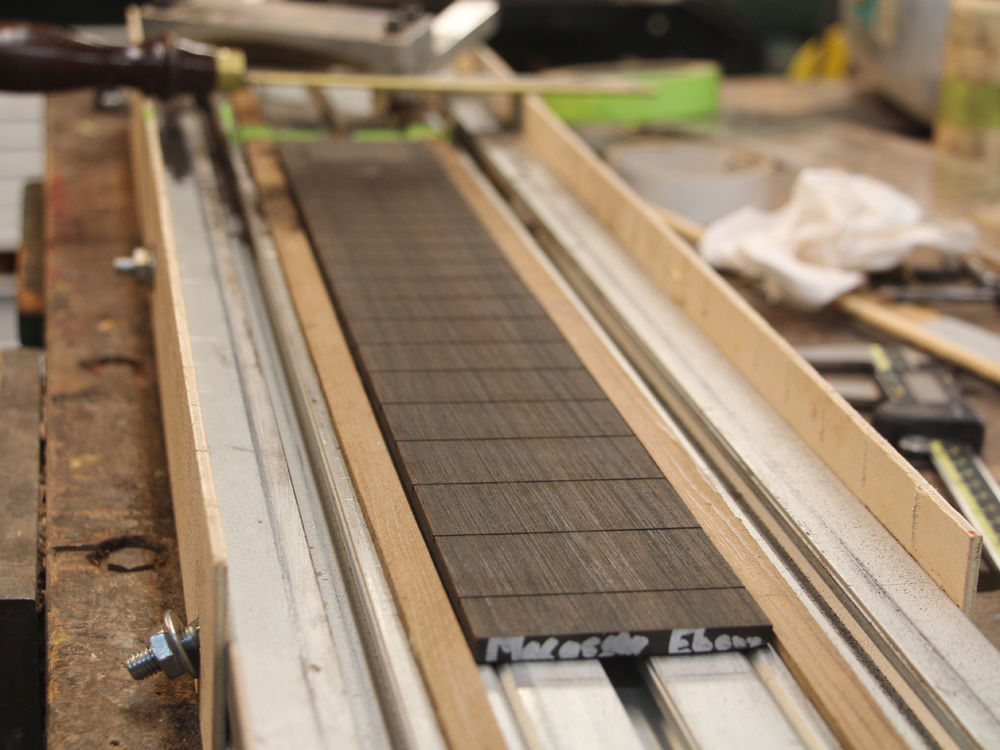
The roughed out fretboard with the slots.
 ( 161 ) 22-Dec-2013
I mount the fretboard blank on a flat surface and then level out the top of the blank with a set of precision sanding blocks.
 ( 162 ) 22-Dec-2013
I use masking tape to mark the outline of the fretboard.
 ( 163 ) 22-Dec-2013
Here I have set up to install the fretwire. I am using a fretwire that looks like gold so it will match the tuning hardware.
 ( 164 ) 22-Dec-2013
I cut the fretwire to length and then gently hammer it into place. I check carefully to make sure the fretwire is fully seated to the fretboard.
 ( 165 ) 22-Dec-2013
 ( 166 ) 22-Dec-2013
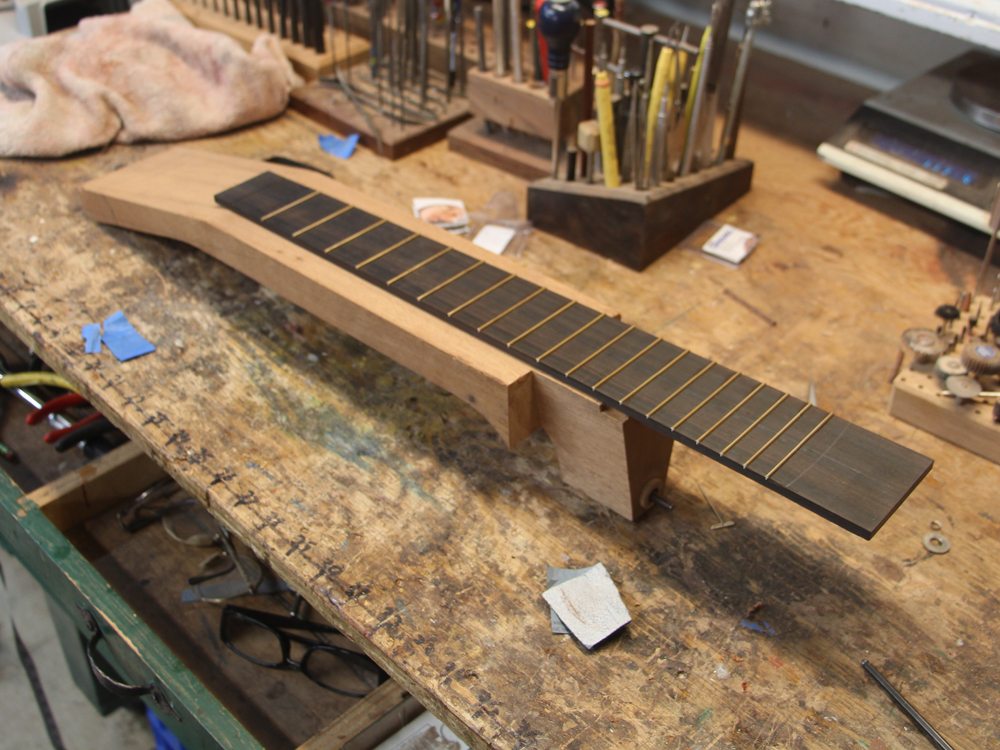
Now I will use the belt sander to bring the fretboard blank to its final shape. The masking tape has been trimmed so it exactly matches the final shape of the fretboard. The advantage of this masking tape method over drawing the the shape with a pencil is that the contrast between the tape and the wood has a zero width where as a pencil line is about 20 mil wide. So, when I am sanding the edge of the blank I know I am done when the sanded edge of the fretboard touches the tape. With a pencil line I have to ask: first edge of the line, middle of the line, second edge? The tape also give much better contrast than the pencil.
 ( 167 ) 22-Dec-2013
Laying out the neck.
 ( 168 ) 22-Dec-2013
I use a small drop of cyanoacrylate glue on the end f the fretwire to make sure the wire won't wiggle free.
 ( 169 ) 22-Dec-2013
I install a small wood plug to cover the end of the trussrod. This will provide some wood for the trussrod cover plate screw to bite into.
 ( 170 ) 22-Dec-2013
I cover the rod with thin tape to seal the gap between the rod and the wood. This will prevent glue from getting into the works when the fretboard is glued on.
 ( 171 ) 22-Dec-2013
I cut a 3 deg draft angle into the heel. This will ensure free motion of the heel in the heel channel as the neck angle is adjusted.
 ( 172 ) 22-Dec-2013
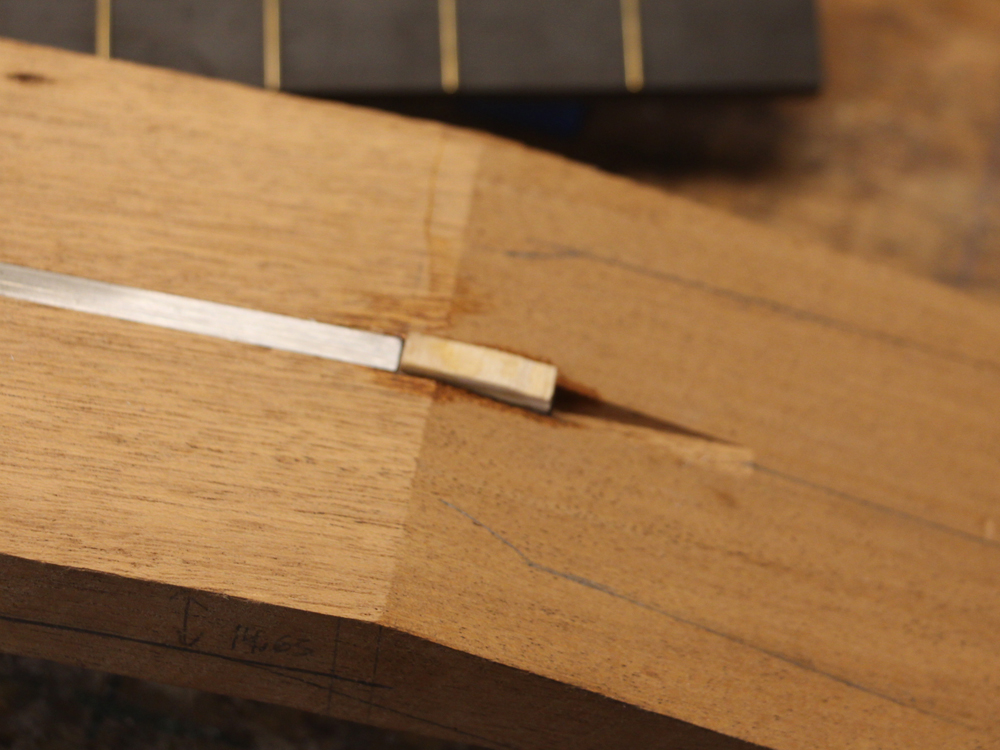
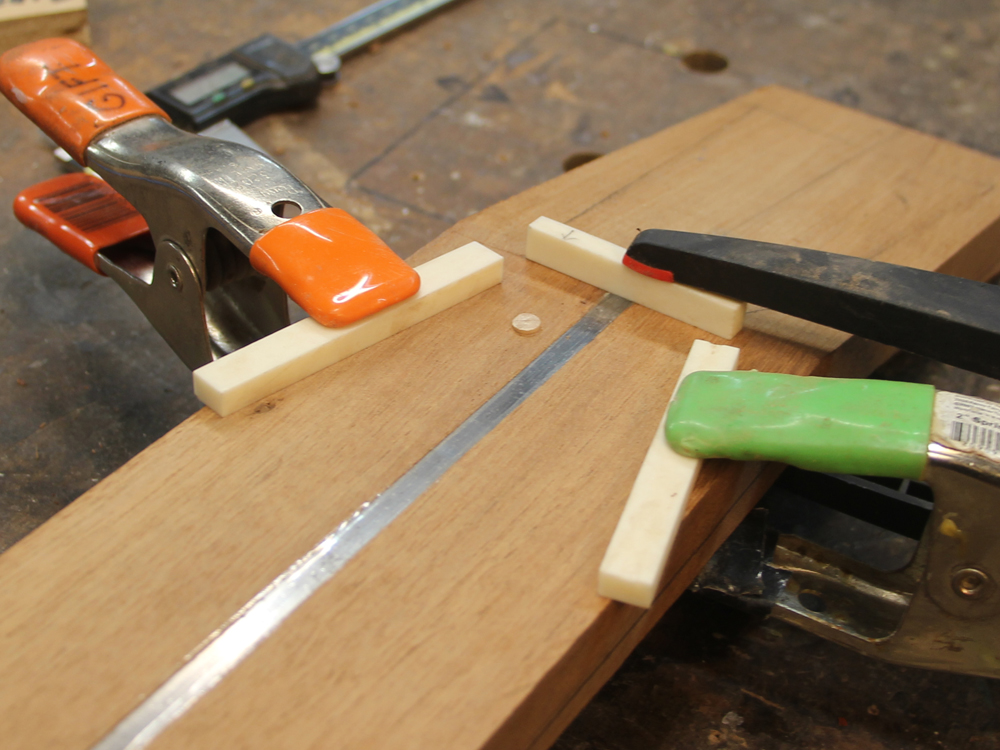
I use fiducial buttons to guide the placement of the fretboard on the neck blank when it is glued on. The bone blocks provide temporary limits as the button is glued in place.
 ( 173 ) 22-Dec-2013
The button is cut so it is a bit proud of the surface.
 ( 174 ) 22-Dec-2013
I put a drop of glue on the end of the button and press the fretboard into place.
 ( 175 ) 22-Dec-2013
The button sticks to the bottom of the fretboard.
 ( 176 ) 22-Dec-2013
I use two buttons on the fretboard. After the buttons are sanded down, so they won't bottom out in their holes, the fretboard can be accurately placed on the neck blank. This system means I can position the fretboard on the neck blank before I glue it up. It is difficult to position the fretboard accurately when the glue is wet, slippery, and messy.
 ( 177 ) 22-Dec-2013
I use epoxy to glue the fretboard to the neck blank.
 ( 178 ) 22-Dec-2013
 ( 179 ) 22-Dec-2013
With the fiducial button system the fretboard and head plate drop right into place.
 ( 180 ) 22-Dec-2013
And all I have to do is clamp it up.
 ( 181 ) 22-Dec-2013
After the glue has set I heat up the glue squeeze out and scrape it away.
 ( 182 ) 22-Dec-2013
Here I am using the milling machine to put a flat surface on the back side of the head stock. I want to make sure the headstock has the proper thickness, and that back side of the headstock is parallel to the top side.
 ( 183 ) 22-Dec-2013
And now The belt sander is used to profile the throat of the neck blank..
 ( 184 ) 22-Dec-2013
And the heel.
 ( 185 ) 22-Dec-2013
I use the bandsaw to trim the plan view outline.
 ( 186 ) 22-Dec-2013
And then the router table with a roller glide bit trims the edges to shape.
 ( 187 ) 22-Dec-2013
I tape (really strong double sided tape) a template on the headstock and trim the headstock to shape.
 ( 188 ) 22-Dec-2013
The milling machine is used to route the slots in the headstock.
 ( 189 ) 22-Dec-2013
And the milling machine accurately drills the holes for the tuning machines.
 ( 190 ) 22-Dec-2013
With the accuracy the milling machine provides the tuning machines dropped into place ~perfectly.
 ( 191 ) 22-Dec-2013
I like to look at the guitar from time to time.
 ( 192 ) 22-Dec-2013
I use masking top to keep make where I don't want to remove any material.
 ( 193 ) 22-Dec-2013
And now all I have to do is carve away everything that doesn't look like the neck.
 ( 194 ) 22-Dec-2013
I have learned to go slow slow slow. It is much easier to remove wood than to put it back.
 ( 195 ) 22-Dec-2013
I made this multi-contour gauge bracket to help me visualize the shape of the neck profile. I continue to work on the neck using a variety of tools until it looks right, feels right, sounds right, and measures right.
 ( 196 ) 22-Dec-2013
This is the User Adjustable Tilt Action Neck hardware.
 ( 197 ) 22-Dec-2013
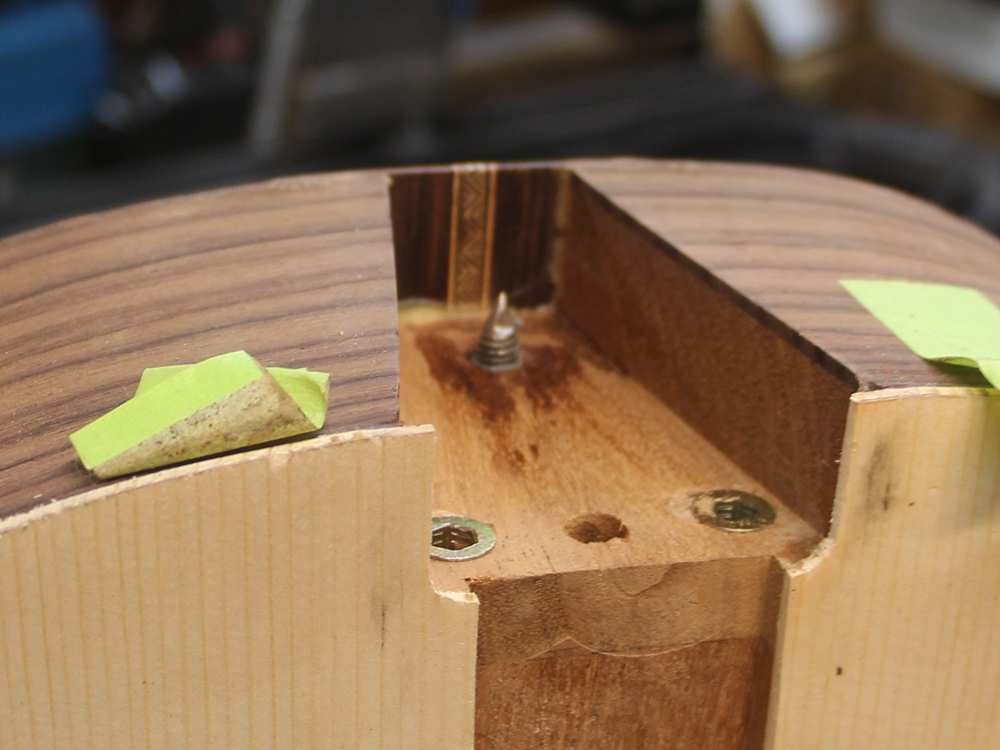
The bolt is held in place with an oak flange.
 ( 198 ) 22-Dec-2013
I press the flange into place so the o-ring compresses slightly. This system will prevent the neck from rattling around when the strings have been removed from the guitar.
 ( 199 ) 22-Dec-2013
To ensure the flange doesn't pull out of the heel under the considerable tension supplied by the strings I install two pegs that run through the edge of the flange.
 ( 200 ) 22-Dec-2013
Everything gets sanded flush.
 ( 201 ) 22-Dec-2013
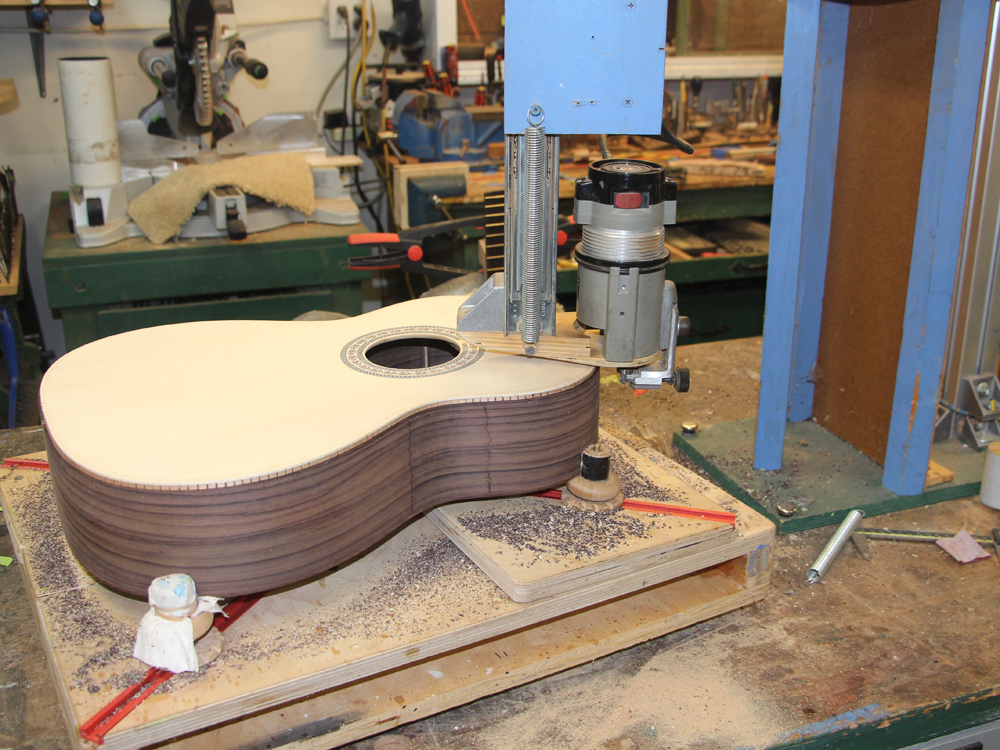
Now I have set up to route the binding channels.
 ( 202 ) 22-Dec-2013
This tool holds the router parallel to the sides of the guitar, even when the top surface is not flat.
 ( 203 ) 22-Dec-2013
I have freedom of motion of the router with this tool while the tool holds the router parallel to the sides. I can accurately control the depth and width of the binding channels.
 ( 204 ) 22-Dec-2013
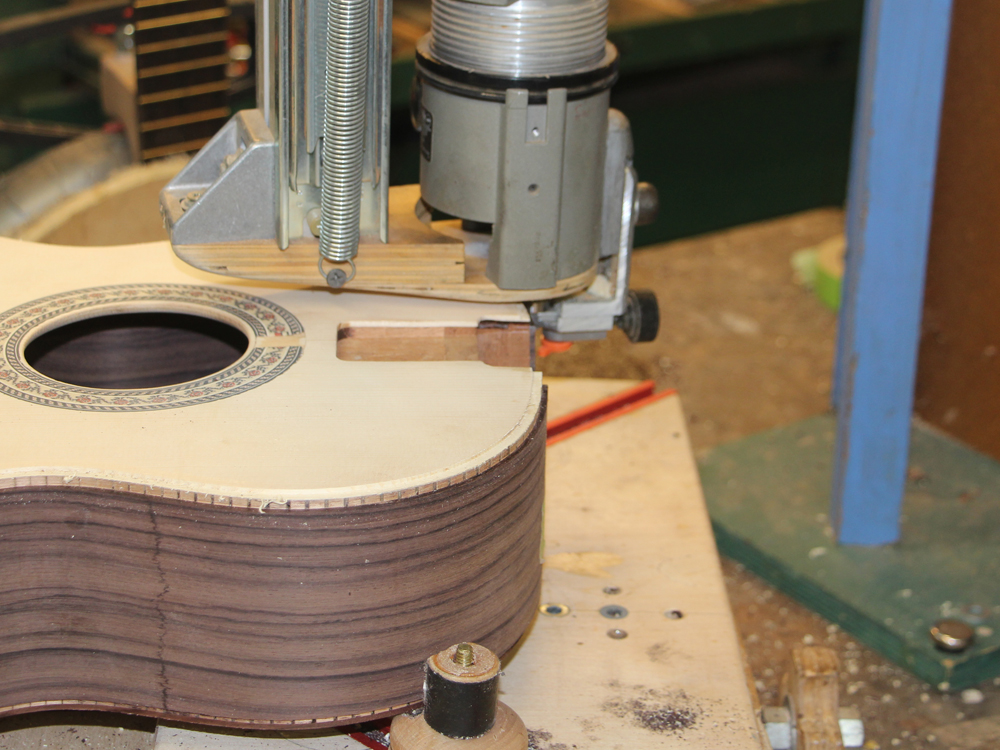
Here you can see the exposed kerfing holding the to top to the side.
 ( 205 ) 22-Dec-2013
A side view of the router base. You can see the platen on the router base is convex so it only touches the top of the guitar right next to the router bit.
 ( 206 ) 22-Dec-2013
The top and back get an equivalent channel for the binding.
 ( 207 ) 22-Dec-2013
And the top gets an additional channel for the purfling.
 ( 208 ) 22-Dec-2013
I use a small hand router for the heel binding channels.
 ( 209 ) 22-Dec-2013
With the neck installed I can trim the heel binding for a good fit. The heel needs to be able to move easily between the binding.
 ( 210 ) 22-Dec-2013
Now I start installing the binding.
 ( 211 ) 22-Dec-2013
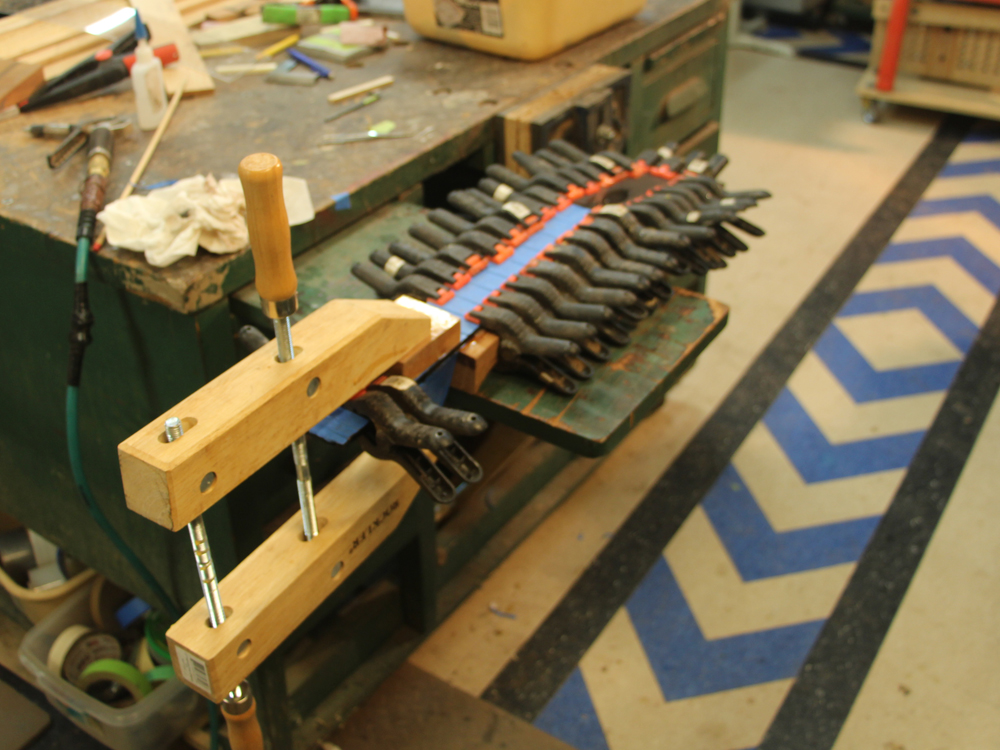
I pin into place the individual pieces of binding starting with a bit of tape and then cyanoacrylate glue.
 ( 212 ) 22-Dec-2013
I use a variety of push sticks and continually check that the binding and purfling are well seated in the channels. The objective is to end up without any gaps in the binding.
 ( 213 ) 22-Dec-2013
Once the binding is glued in place I sand everything flush. I have been careful that the flush/proud relation of the different pieces results in the best outcome. For example, I leave the sides proud to the binding and then sand the sides flush. This means that the width of the binding doesn't get sanded down ending up with the binding look too skinny.
 ( 214 ) 22-Dec-2013
I have to be very careful when sanding the top binding because the spruce top is relatively soft.
 ( 215 ) 22-Dec-2013
Here I am using a pneumatic drum sander to sand the sides flush with the binding.
 ( 216 ) 22-Dec-2013
To give the neck a solid connection to the body I use two set screws with the business end of the screw shaped into rounded points. These screws act as two legs of the mounting tripod.
 ( 217 ) 22-Dec-2013
When I press the neck into place two marks are made where I install will two brass plugs.
 ( 218 ) 22-Dec-2013
The steel set screws and the brass plugs make for a solid and stable connection. The setscrews indent the brass slightly resulting in a connection that won't slip, yet allows the neck to change angle.
 ( 219 ) 22-Dec-2013
The bottom of the heel needs to be sanded coplanar with the back of the guitar.
 ( 220 ) 22-Dec-2013
I have created this sanding block that holds the sandpaper at just the right angle while letting me stroke it back and forth over the end of the heel..
 ( 221 ) 22-Dec-2013
 ( 222 ) 22-Dec-2013
Although every effort has been made to yield a perfectly straight fretboard, sadly it never works out that way. So,I use a set of straight edge sanding blocks to level out any bumps or valleys in the set of frets. I work until I can't get a 2 mil feeler gauge in between the fret and a straight edge laid on the fretboard.
 ( 223 ) 22-Dec-2013
The crown of the frets then need to be reshapen. I use special diamond file to shape the frets.
 ( 224 ) 22-Dec-2013
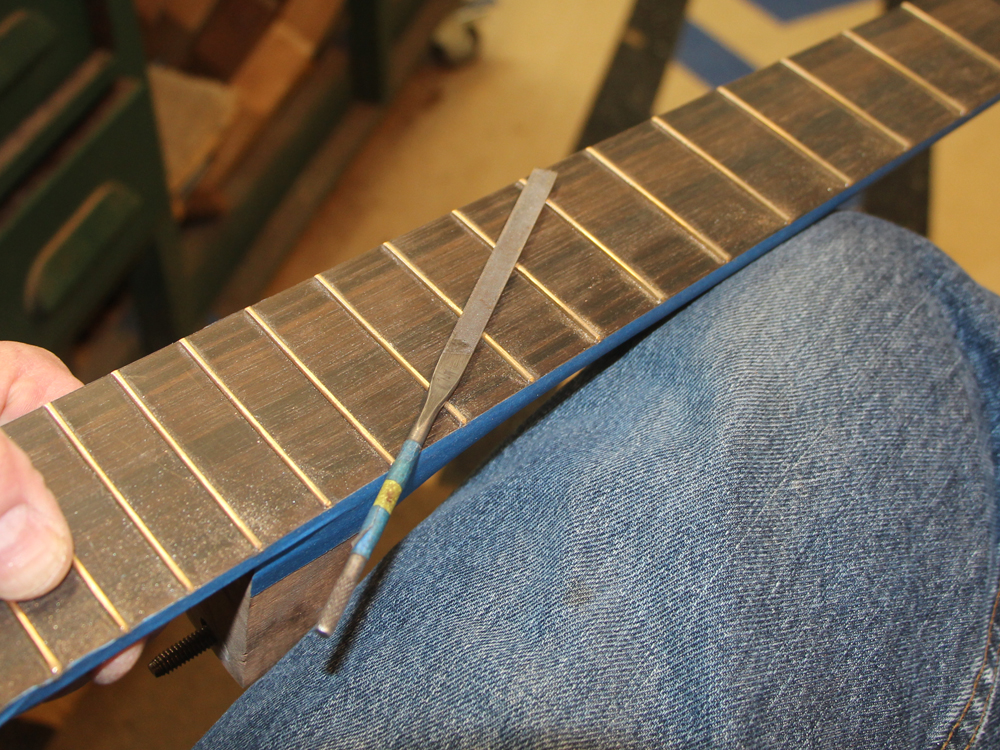
I like to shape the ends of the frets into tiny little spherical sections.
 ( 225 ) 22-Dec-2013
This makes sure the frets won't catch your fingers when playing.
 ( 226 ) 22-Dec-2013
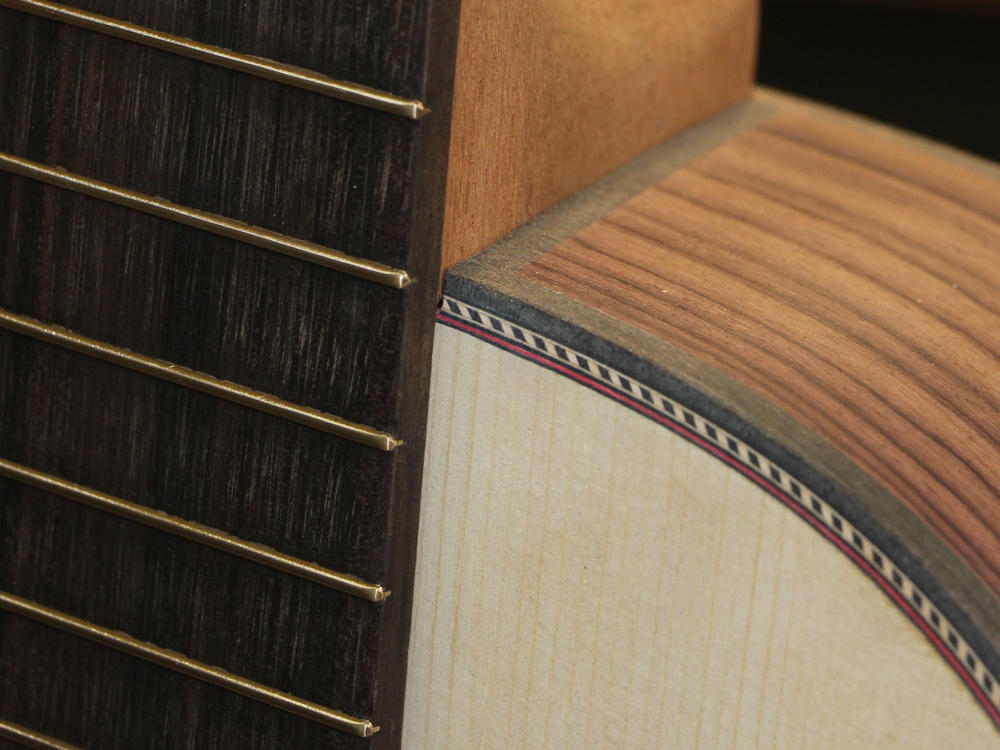
A view of the rosette and the binding..
 ( 227 ) 22-Dec-2013
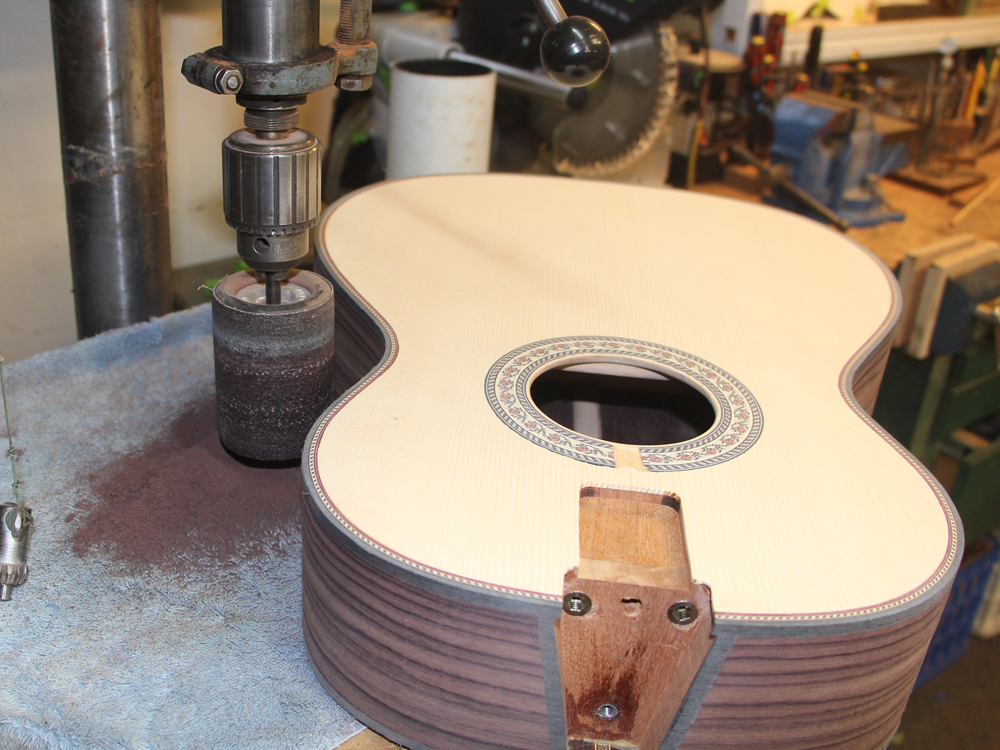
I work so the gaps between the neck and the body are nearly invisible. My objective is to include technical advantages of an adjustable neck without calling attention to it. I want my guitars to look like a traditional guitar at first blush while including the benefits of Portland Guitar technical innovations.
 ( 228 ) 22-Dec-2013
You can see the cantilevered portion of the fretboard floating over the top plate. The neck angle adjustment bolt is accessible through the hole in the front of the heel. This hole will ultimately get a decorative plug.
 ( 229 ) 22-Dec-2013
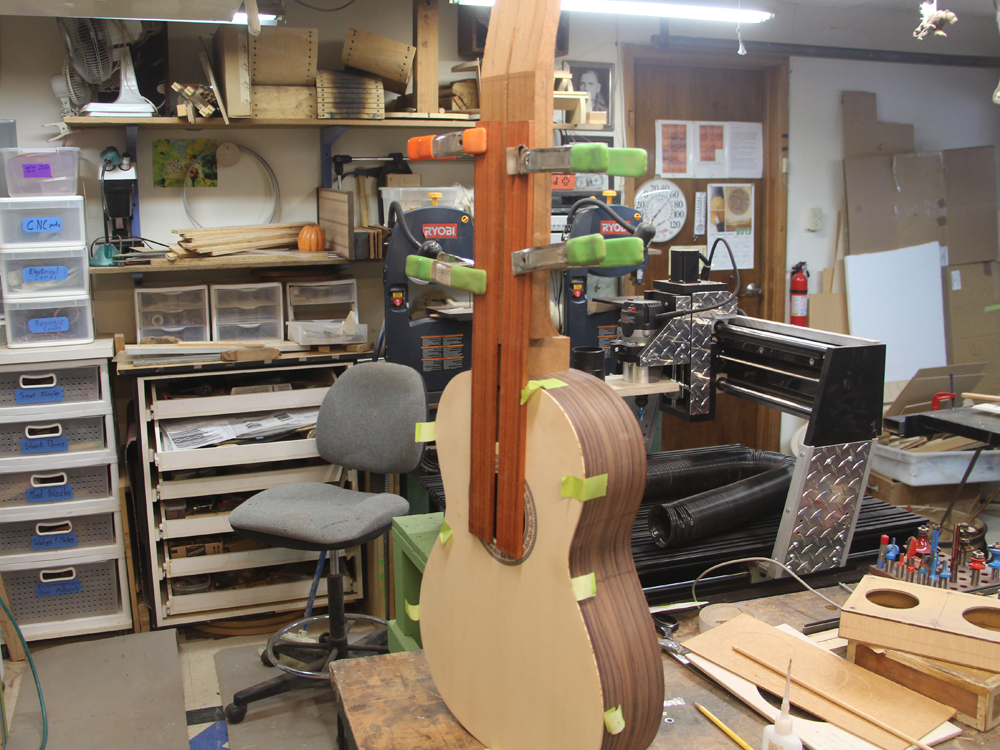
As the guitar stands today. Next up is installing the rose logo and heel cap, then detailing and finish work.